自身で定義した g.Scene に組み込む
すでに自分でゲーム用の g.Scene を定義している場合の本ライブラリの組み込み方を説明します.
描画内容の制御を自分で用意するか、本ライブラリ提供のものを利用するかで少し手順が変わります. 本ライブラリ提供のものを利用するとエンティティ間の前後関係などは自動で制御されますが、本ライブラリ以外に描画するエンティティが多種ある場合や、独自のレイアウト機構を持つ場合、干渉する可能性があります. 自分で用意する場合は 「独自レイアウトの場合」 の注意書きに沿って構築してください.
概要
自身の g.Scene の onLoad() の呼び出し箇所に以下を追記してください.
以降で内容を説明します.
+ import { Broadcaster, BroadcasterBuilder, CommentContextSupplier, CommentDeployer, CommentDeployerBuilder, CommentSupplier, CommentSupplierBuilder, Field, FieldBuilder, Layer, LayerBuilder, Scorer, ScorerBuilder, Screen, ScreenBuilder, Spot, SpotBuilder, Ticker, TickerBuilder } from '@yasshi2525/live-on-air';

  export const main = (param: GameMainParameterObject): void => {
    // 自身で実装している g.Scene
    const scene = new g.Scene({ game: g.game });
    scene.onLoad.add(() => {
      // 既存の g.Scene の初期化処理
+     // 以下から本ライブラリの初期化処理です
+     const layer: Layer = new LayerBuilder(scene).build();
+     const field: Field = new FieldBuilder().build();
+     field.container = layer.field;
+     const screen: Screen = new ScreenBuilder(scene).build();
+     screen.container = layer.screen;
+     const broadcaster: Broadcaster = new BroadcasterBuilder(scene).build();
+     broadcaster.standOn(field);
+     const spot: Spot = new SpotBuilder(scene).build();
+     spot.deployOn(field);
+     spot.attach(screen);
+     const commentSupplier: CommentSupplier = new CommentSupplierBuilder(scene).build();
+     const commentDeployer: CommentDeployer = new CommentDeployerBuilder(scene).build();
+     commentDeployer.subscribe(commentSupplier);
+     commentDeployer.container = layer.comment;
+     const commentContextSupplier: CommentContextSupplier = new CommentContextSupplier({ broadcaster, field, screen });
+     commentSupplier.start(commentContextSupplier);
+     const scorer: Scorer = new ScorerBuilder(scene).build();
+     scorer.container = layer.header;
+     commentSupplier.onSupply.add(() => scorer.add(1));
+     scorer.enable();
+     const ticker: Ticker = new TickerBuilder(scene).build();
+     ticker.container = layer.header;
+     ticker.onExpire.add(() => scorer.disable());
+     ticker.enable();
    });
    g.game.pushScene(scene);
  };
[!NOTE] 独自レイアウトの場合、
Layerは不要なので初期化・設定処理を削除してください.
- import { Broadcaster, BroadcasterBuilder, CommentContextSupplier, CommentDeployer, CommentDeployerBuilder, CommentSupplier, CommentSupplierBuilder, Field, FieldBuilder, Layer, LayerBuilder, Scorer, ScorerBuilder, Screen, ScreenBuilder, Spot, SpotBuilder, Ticker, TickerBuilder } from '@yasshi2525/live-on-air';
+ import { Broadcaster, BroadcasterBuilder, CommentContextSupplier, CommentDeployer, CommentDeployerBuilder, CommentSupplier, CommentSupplierBuilder, Field, FieldBuilder, Scorer, ScorerBuilder, Screen, ScreenBuilder, Spot, SpotBuilder, Ticker, TickerBuilder } from '@yasshi2525/live-on-air';
  // ...
    // 以下から本ライブラリの初期化処理です
-   const layer: Layer = new LayerBuilder(scene).build();
    const field: Field = new FieldBuilder().build();
-   field.container = layer.field;
    const screen: Screen = new ScreenBuilder(scene).build();
-   screen.container = layer.screen;
    const broadcaster: Broadcaster = new BroadcasterBuilder(scene).build();
    broadcaster.standOn(field);
    const spot: Spot = new SpotBuilder(scene).build();
    spot.deployOn(field);
    spot.attach(screen);
    const commentSupplier: CommentSupplier = new CommentSupplierBuilder(scene).build();
    const commentDeployer: CommentDeployer = new CommentDeployerBuilder(scene).build();
    commentDeployer.subscribe(commentSupplier);
-   commentDeployer.container = layer.comment;
    const commentContextSupplier: CommentContextSupplier = new CommentContextSupplier({ broadcaster, field, screen });
    commentSupplier.start(commentContextSupplier);
    const scorer: Scorer = new ScorerBuilder(scene).build();
-   scorer.container = layer.header;
    commentSupplier.onSupply.add(() => scorer.add(1));
    scorer.enable();
    const ticker: Ticker = new TickerBuilder(scene).build();
-   ticker.container = layer.header;
    ticker.onExpire.add(() => scorer.disable());
    ticker.enable();
  });
  // ...
Layer (本ライブラリの描画コンポーネント) の初期化
[!NOTE] 独自レイアウトの場合、
Layerは不要です. 次の手順に進んでください.
まず、 Layer を初期化します.
Layer は本ライブラリが提供するコンポーネントの前面・背面を設定します.
Layer を作成しないとゲーム画面上に描画されない点にご注意ください.
Layer は LayerBuilder の build() を使用して作成してください.
import { Layer, LayerBuilder } from '@yasshi2525/live-on-air';
const layer: Layer = new LayerBuilder(scene).build();
Field と Screen (マップ画面、放送画面の制御コンポーネント)の初期化
次に Field と Screen を初期化します.
Field は放送者が訪問先を巡回していく画面を制御します.
Screen は訪問先で生放送する画面を制御します.
この後説明する Broadcaster, Spot はこれらに登録しないと
ゲームが進行できない点にご注意ください.
Field, Screen は FieldBuilder, ScreenBuilder の build() を使用して作成してください.
import { Field, FieldBuilder, Screen, ScreenBuilder } from '@yasshi2525/live-on-air';
const field: Field = new FieldBuilder().build();
const screen: Screen = new ScreenBuilder(scene).build();
そして Field, Screen をゲーム画面上に描画するために、 Layer のフィールドと紐づけます.
Field, Screen の container フィールドに各コンポーネントが描画されます.
これを対応する Layer の field, screen フィールドとしてください.
  const field: Field = new FieldBuilder().build();
+ field.container = layer.field;
  const screen: Screen = new ScreenBuilder(scene).build();
+ screen.container = layer.screen;
[!NOTE] 独自レイアウトの場合、
FieldScreenのcontainerフィールドを自身で定義したエンティティにしてください.例:
  const field: Field = new FieldBuilder().build();
- field.container = layer.field;
+ field.container = <自身で定義した、マップ描画用エンティティ>;
  const screen: Screen = new ScreenBuilder(scene).build();
- screen.container = layer.screen;
+ screen.container = <自身で定義した、生放送描画用エンティティ>;
Broadcaster, Spot (放送者、訪問先のコンポーネント)の初期化
次に Broadcaster と Spot を初期化します.
Broadcaster は放送者を、 Spot は訪問先を表します.
Broadcaster, Spot は BroadcasterBuilder, SpotBuilder の build() を使用して作成してください.
import { Broadcaster, BroadcasterBuilder, Spot, SpotBuilder } from '@yasshi2525/live-on-air'
const broadcaster: Broadcaster = new BroadcasterBuilder(scene).build();
const spot: Spot = new SpotBuilder(scene).build();
どちらも Field に登録しないと機能しません.
  const broadcaster: Broadcaster = new BroadcasterBuilder(scene).build();
+ broadcaster.standOn(field);
  const spot: Spot = new SpotBuilder(scene).build();
+ spot.deployOn(field);
Sopt はさらに Screen にも登録しないと機能しません.
  const broadcaster: Broadcaster = new BroadcasterBuilder(scene).build();
  broadcaster.standOn(field);
  const spot: Spot = new SpotBuilder(scene).build();
  spot.deployOn(field);
+ spot.attach(screen);
CommentSupplier, CommentDeployer, CommentContextSupplier (コメント表示コンポーネント)の初期化
そして CommentSupplier, CommentDeployer, CommentContextSupplier を初期化します.
CommentSupplier はどのようなコメントを出力するか、 CommentDeployer はどのようにコメントを描画させるか制御します.
CommentContextSupplier はコメントの表示条件を制御するために環境情報を提供します.
CommentSupplier, CommentDeployer は CommentSupplierBuilder, CommentDeployerBuilder の build() を使用して作成してください.
    import { CommentContextSupplier, CommentDeployer, CommentDeployerBuilder, CommentSupplier, CommentSupplierBuilder } from '@yasshi2525/live-on-air'
    const commentSupplier: CommentSupplier = new CommentSupplierBuilder(scene).build();
    const commentDeployer: CommentDeployer = new CommentDeployerBuilder(scene).build();
    const commentContextSupplier: CommentContextSupplier = new CommentContextSupplier({ broadcaster, field, screen });
CommentDeployer は描画対象の入力元として CommentSupplier を設定する必要があります.
    const commentSupplier: CommentSupplier = new CommentSupplierBuilder(scene).build();
    const commentDeployer: CommentDeployer = new CommentDeployerBuilder(scene).build();
+   commentDeployer.subscribe(commentSupplier);
    const commentContextSupplier: CommentContextSupplier = new CommentContextSupplier({ broadcaster, field, screen });
加えて CommentDeployer は描画内容を画面に表示するため、 Layer とひも付ける必要があります.
    const commentSupplier: CommentSupplier = new CommentSupplierBuilder(scene).build();
    const commentDeployer: CommentDeployer = new CommentDeployerBuilder(scene).build();
    commentDeployer.subscribe(commentSupplier);
+   commentDeployer.container = layer.comment;
    const commentContextSupplier: CommentContextSupplier = new CommentContextSupplier({ broadcaster, field, screen });
そして CommentSupplier が場面に合わせて条件に合ったコメントを出力できるよう、 CommentContextSupplier を設定する必要があります.
また、 start(CommentContextSupplier) を呼び出すことでコメントの描画を開始します.
    const commentSupplier: CommentSupplier = new CommentSupplierBuilder(scene).build();
    const commentDeployer: CommentDeployer = new CommentDeployerBuilder(scene).build();
    commentDeployer.subscribe(commentSupplier);
    commentDeployer.container = layer.comment;
    const commentContextSupplier: CommentContextSupplier = new CommentContextSupplier({ broadcaster, field, screen });
+   commentSupplier.start(commentContextSupplier);
[!NOTE] 独自レイアウトの場合、
CommentDeployerのcontainerフィールドを自身で定義したエンティティにしてください.例:
  const commentSupplier: CommentSupplier = new CommentSupplierBuilder(scene).build();
  const commentDeployer: CommentDeployer = new CommentDeployerBuilder(scene).build();
  commentDeployer.subscribe(commentSupplier);
- commentDeployer.container = layer.comment;
+ commentDeployer.container = <自身で定義した、コメント描画用エンティティ>
  const commentContextSupplier: CommentContextSupplier = new CommentContextSupplier({ broadcaster, field, screen });
  commentSupplier.start(commentContextSupplier);
Scorer (スコア制御コンポーネント) の初期化
次に Scorer を初期化します. Scorer は得点の保持と描画を行います.
Scorer は ScorerBuilder の build() を使用して作成してください.
    import { Scorer, ScorerBuilder } from '@yasshi2525/live-on-air'
    const scorer: Scorer = new ScorerBuilder(scene).build();
まず、 Scorer が描画内容を画面に出力するため、 Layer と紐づけます.
    const scorer: Scorer = new ScorerBuilder(scene).build();
+   scorer.container = layer.header;
次に、コメント生成時に加点されるよう CommentSupplier の onSupply トリガにハンドラを追加します.
    const scorer: Scorer = new ScorerBuilder(scene).build();
    scorer.container = layer.header;
+   commentSupplier.onSupply.add(() => scorer.add(1));
そして、加点処理の受け付けを開始するため Scorer の enable() を実行します.
    const scorer: Scorer = new ScorerBuilder(scene).build();
    scorer.container = layer.header;
    commentSupplier.onSupply.add(() => scorer.add(1));
+   scorer.enable();
[!NOTE] 独自レイアウトの場合、
Scorerのcontainerフィールドを自身で定義したエンティティにしてください.例:
  const scorer: Scorer = new ScorerBuilder(scene).build();
- scorer.container = layer.header;
+ scorer.container = <自身で定義した、コメント描画用エンティティ>
  commentSupplier.onSupply.add(() => scorer.add(1));
  scorer.enable();
Ticker (残り時間制御コンポーネント) の初期化
最後に Ticker を初期化します. Ticker は残り時間のカウントダウンと描画を行います.
Ticker は TickerBuilder の build() を使用して作成してください.
    import { Ticker, TickerBuilder } from '@yasshi2525/live-on-air'
    const ticker: Ticker = new TickerBuilder(scene).build();
まず、 Ticker が描画内容を画面に出力するため、 Layer と紐づけます.
    const ticker: Ticker = new TickerBuilder(scene).build();
+   ticker.container = layer.header;
次に、残り時間がなくなったら得点が加算されないよう Ticker の onExpire トリガにハンドラを追加します.
    const ticker: Ticker = new TickerBuilder(scene).build();
    ticker.container = layer.header;
+   ticker.onExpire.addOnce(() => scorer.disable());
そして、残り時間のカウントダウンを開始するため Ticker の enable() を実行します.
    const ticker: Ticker = new TickerBuilder(scene).build();
    ticker.container = layer.header;
    ticker.onExpire.addOnce(() => scorer.disable());
+   ticker.enable();
[!NOTE] 独自レイアウトの場合、
Tickerのcontainerフィールドを自身で定義したエンティティにしてください.例:
  const ticker: Ticker = new TickerBuilder(scene).build();
- ticker.container = layer.header;
+ ticker.container = <自身で定義した、コメント描画用エンティティ>
  ticker.onExpire.addOnce(() => ticker.disable());
  ticker.enable();
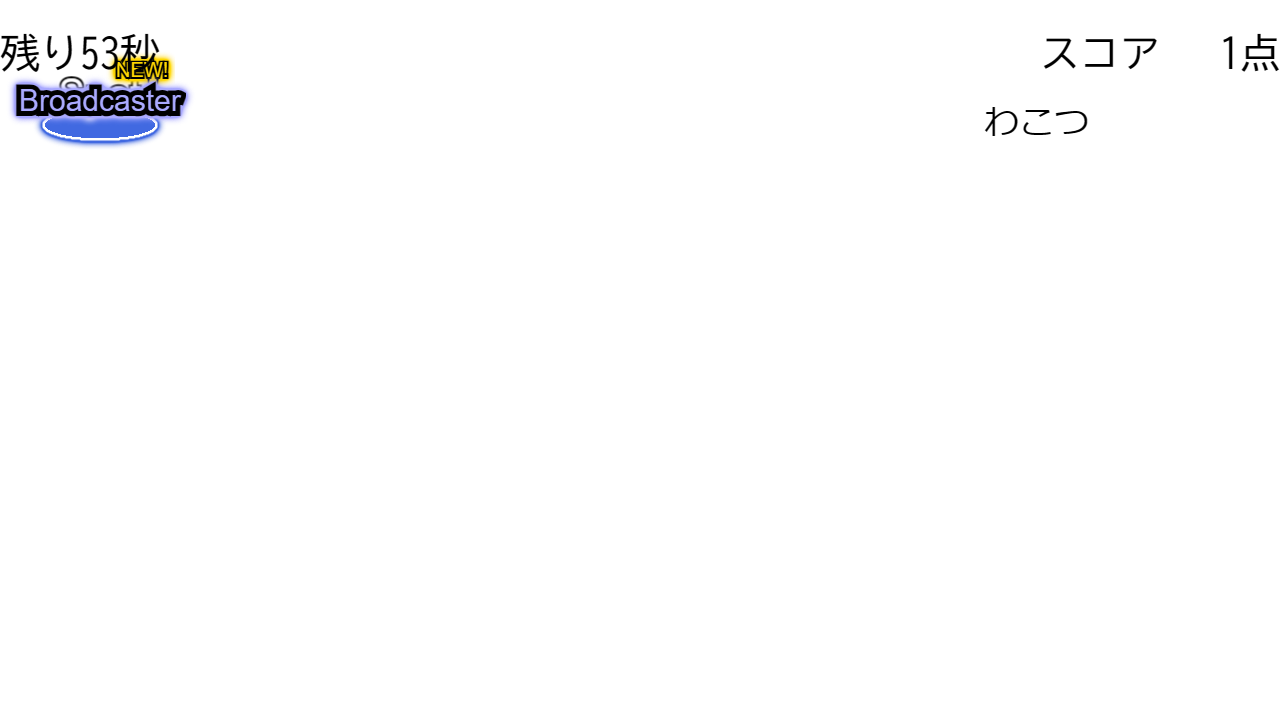
お疲れ様でした. 以上がすでに存在する g.Scene に本ライブラリを組み込む手順です.
上記を実行すると下記のような画面が出力されます.